The perspective representation of landscapes and events goes way back in history and has always fascinated people. One of the first panoramas is from the Qingming scroll, from the 18th century.
The origin of the term panorama is found in land surveying. The panorama was an equally important geographical representation alongside maps, reliefs, and profiles. In 1754, the first scientific panorama was created. It was the mountain panorama by Jacques-Barthélemy Micheli du Crest from Geneva.

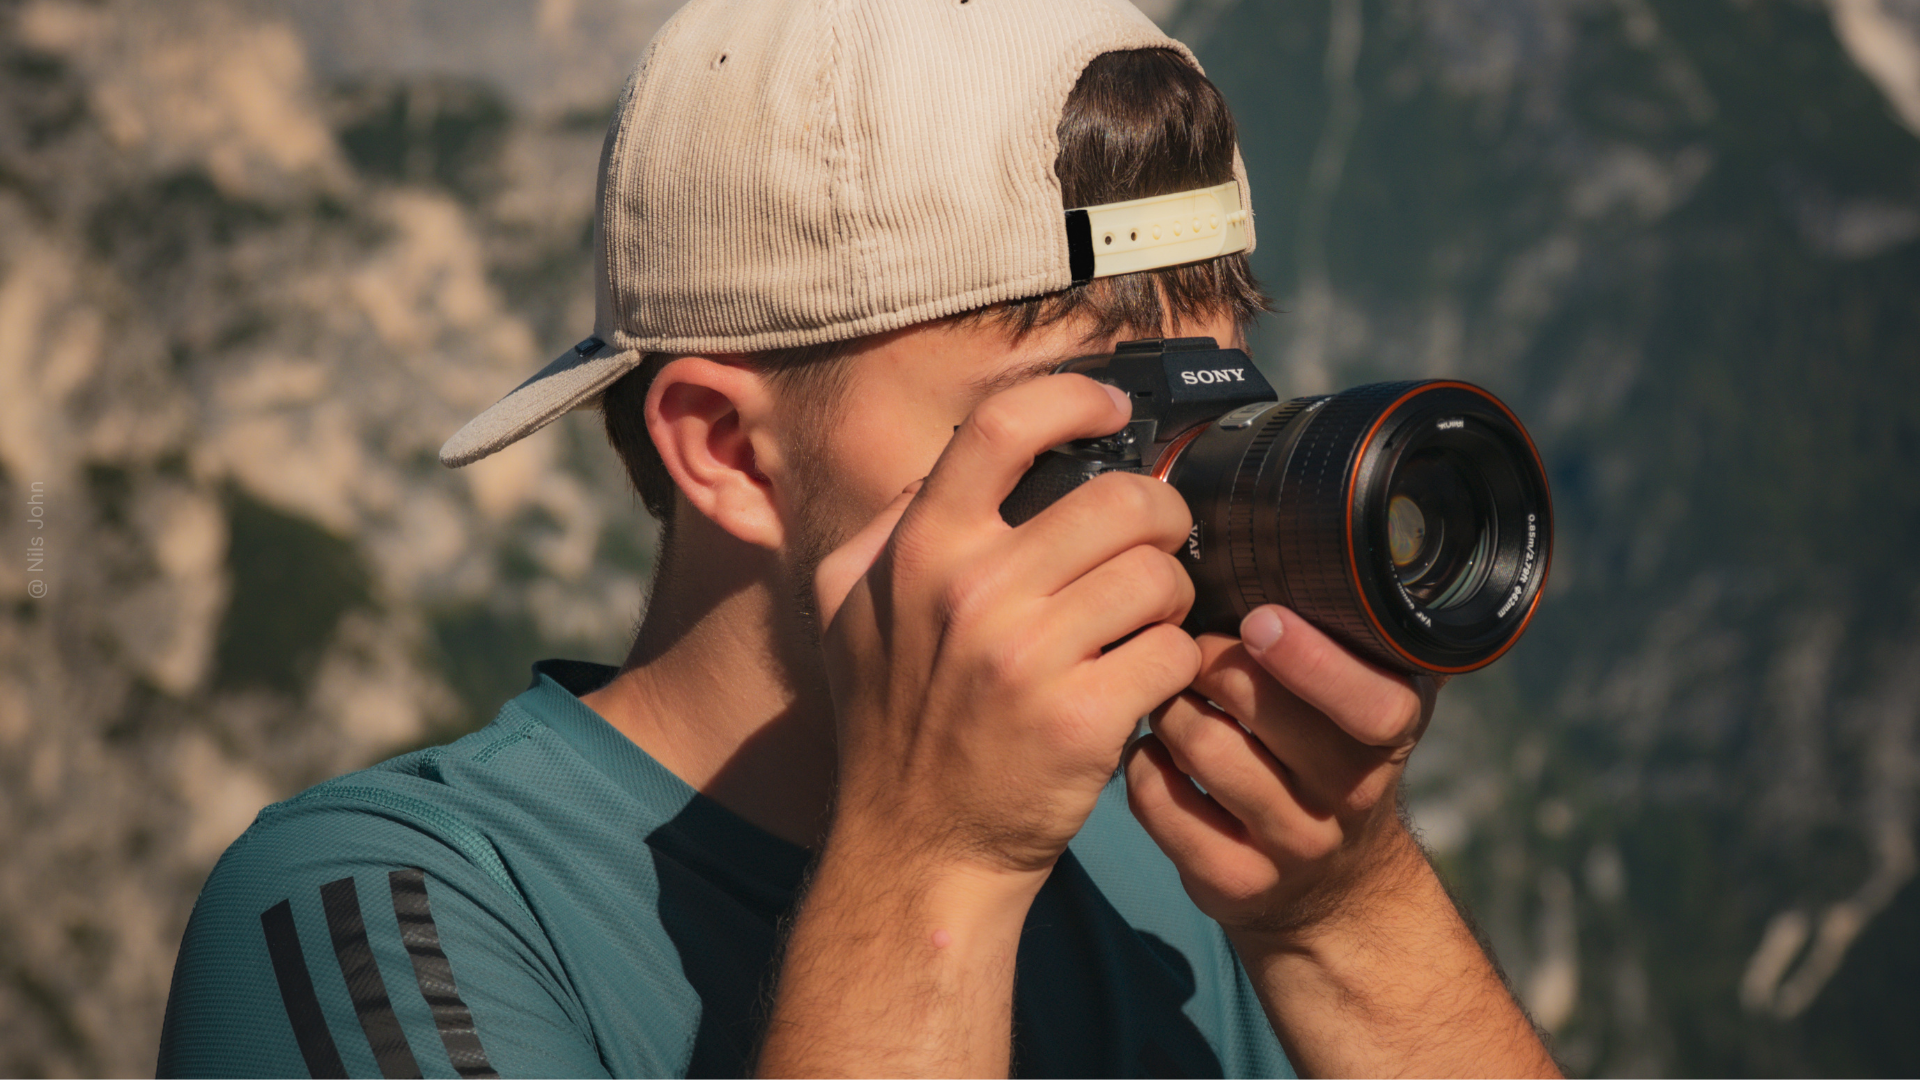
Until a few years ago, creating panoramas was quite complex. There were special cameras that made this possible, but they were prohibitively expensive for the average citizen. Today, the necessary equipment is very high-quality and the equipment for panorama photography is also affordable for amateur photographers. But what do I need for a panorama photo and how do I get a good result? Here you will find professional tips and a step-by-step guide to panorama photography. Because the world and nature offer an incredible number of possibilities for breathtaking panoramas, as a single photo is simply too small for many landscapes. Only panorama photography makes it possible to authentically capture the view of the city skyline and a deep valley in landscape photography. Especially in conjunction with 360-degree cameras and VR glasses, exciting new possibilities arise here (full-sphere camera) that anyone can afford for little money. Unlike the hemispherical panorama (cylindrical panorama), which depicts 360° horizontally but never the zenith (view upwards) and nadir (view downwards), a spherical panorama (spherical panorama) reproduces all viewing angles that are visible from one viewpoint. This article provides an easy introduction to panorama photography for experienced photographers, but also for beginners.
Tips & explanations for panorama photography – panorama without vertical view
First of all, you should know that a classic panoramic image with a DSLR or mirrorless camera, i.e., a so-called horizontal hemispherical panorama without an upward or downward view, is taken in manual mode to achieve even exposure of the entire image section. Some familiarity with Auto ISO and aperture is required. Once you have set the panorama photography settings, you should keep them for each image to avoid differences in brightness and sharpness. Autofocus can help, but to intentionally use underexposure or overexposure artistically for your own image aesthetics and design, you should choose the manual shooting mode. A tripod and a high-quality panoramic head, which can also be purchased as a fully automatic version, providing a smooth camera pan, are also usually required. Here we can recommend the Rollei Panorama Head Mark II.
Panorama Photography Equipment
- Camera (compact camera, panoramic camera, smartphone or system camera)
- Tripod
- Panorama Ball Head
- A wide-angle lens is ideal
- optional: Lightroom or Photoshop Elements for post-processing
Panorama Photography Tip 1 – uniform exposure time
Once the camera has been mounted on a tripod and the Rollei Panorama Head Mark II, you need to set the image section and choose the field of view. This allows you to set the correct exposure time using the display. The part of the image section with the brightest point is chosen as the reference point and ideally slightly underexposed, which is somewhat easier than exact exposure.
This is therefore possible with high-quality panorama cameras as well as with compact cameras, smartphones, and DSLRs.
Panorama Photography Tip 2 – manually set the focal length
First, a focal point must be selected and targeted. This is the basic prerequisite for manually setting the focal length. This way, the panorama series is taken with identical focal length, which is just as important as the uniform exposure time for panorama photography.
You have to proceed exactly here, because even Elements or other panorama programs are not able to combine shots with different focal lengths into a panorama.
So, especially with zoom lenses, work precisely, e.g., with Sigma models.
Panorama Photography Tip 3 – choose the optimal focal point
The focal point should be approx. 1/3 of the maximum distance between the camera and the subject. Then, the autofocus is switched off.
Panorama Photography Tip 4 – Which aperture?
This is especially important for the subsequent digital image processing of panorama images. Furthermore, opinions differ on the aperture setting. Here you simply have to gain your own experience and develop a feeling for your own image aesthetics. An additional article about the aperture value can also be found in the Rollei blog.
Basically, it can be said that you should choose a high aperture value for sharp panoramic images. This is because the aperture opening is correspondingly small, and thus the sharp image section is very large. For focusing on a certain part of the image section with a blurred background, i.e., a shallow depth of field, you should choose a low aperture, as this creates a large aperture opening, which reduces the sharp image section.
This is primarily used for artistic image composition, as the blurred background does not distract from the main subject's focus object.

Guide to panorama photography – what was that about a nodal point?
In panorama photography, the term "nodal point" is always used incorrectly. You're probably thinking, "What? Of course..."
This is unfortunately incorrect.
There are two nodal points – or node points – the front and the rear nodal point. For panorama photography, the relevant pivot point usually does not coincide with the nodal points. Strictly speaking, the relevant point for panorama photography is the entrance pupil of the lens used. The position of the entrance pupil of the lens is crucial for panorama photography, or for creating a panorama from several individual images.
Only if the camera is panned over the pivot point of the entrance pupil of the system can the individual images be combined into a panorama with a stitching program without major errors or rework. If only distant objects are photographed, the exact pan around the entrance pupil, or the center of the two nodal points, is not particularly important. However, if you have panoramas that depict distant objects and close objects simultaneously, an imprecise setting will have a corresponding effect.
So, it can be said that setting up the pivot point is crucial for a good panoramic photo.
Can I create a panorama on a normal tripod?
Absolutely: No. Because this pivot point has to be correct, you cannot create a good panoramic photo with a tripod and a camera mounted normally.
We may all have tried this before. This creates so-called "ghost images," which are caused by the shifting of the unconfigured axis of rotation. However, this is also easy to understand. Every camera has the tripod thread in a different place, so the axis of rotation alone cannot be correct.
A nodal point adapter provides a remedy. However, as we have just read, this is only conditionally related to the "real" nodal points.
Therefore, the common term is panoramic head.
The Panoramic Head
A panoramic head is mounted on a tripod and allows precisely this alignment of the camera around the optimal pivot point.

To find the optimal pivot point for a panoramic photo, only two additional steps are essentially necessary. You must first find the horizontal center of the camera and then the axis of rotation around the entrance pupil of the lens.
But first things first.
How do I use a panoramic head with a tripod?
A panoramic head consists of a rotating plate with a degree scale. The horizontal rail for positioning is mounted on the rotating plate. This serves to determine the horizontal center of the camera. (Step 1).
A vertical rail is attached to the left side of the horizontal (an L). At the top of the vertical is the pivot point for the camera rail.

This rail is used to adjust the camera in depth to the pivot point, where the entrance pupil of the lens is defined. (Step 2).
Setting up the camera with a panoramic head
First, the camera is screwed onto the base plate. This is inserted into the second rail. The Rollei Panoramakopf 200 has push buttons that you have to press to insert each rail. This is very practical, as it means the camera cannot fall out even if the locking screws are not tightened. So you always have the assurance that no expensive equipment can be damaged during setup.
The camera is rotated downwards on the second rail. The lens points towards the center of the tripod (90° position on the Rollei Panoramakopf 200). The locking screw of the lower rail is loosened. You look through the camera's viewfinder and position the camera horizontally so that the center of the camera points to the cross on the rotating plate of the panoramic head. The Rollei Panoramakopf has correspondingly long rails so that the autofocus of the DSLR also triggers. This is very practical, as otherwise you would not see a sharp cross. Once this center point has been set, it is best to mark the millimeter number on the lower rail for the corresponding camera.
In the second step, the camera is rotated 90 degrees with the degree scale and the second rail. Now the lens points forward and the angle of rotation is locked. Now the angle of rotation of the camera must be set, or rather the entrance pupil of the lens. With the second rail, the camera can be adjusted in depth. This means pulling it closer to you or pushing it away.
Here, the pivot point is now set up. You look for two marks in the camera's viewfinder that are offset in distance. A tree and a house behind it, for example, or a door frame and a floor lamp indoors. These two marks will certainly show differences in distance during the first horizontal pan. The camera is now adjusted on the second rail, moving it away from or towards the body, until this remembered distance between the two marks no longer varies.
Once this is done, the camera setup is complete and you can start taking individual shots.
Individual images for the panorama
The individual images should overlap by 30% so that the stitching software has enough "meat" to be able to stitch the photos together.
With the panoramic head from Rollei, you have various threads to set degree values. If you insert the screw at 15deg, you will hear a click every 15 degrees when you rotate the panoramic head. This is the cue for the next photo.
The click grids should be set to the focal length of the lens and the format. Whether you shoot in portrait or landscape format, the overlap of the individual images naturally changes.
A simple cylindrical panorama
You should start with a simpler panorama, a so-called cylindrical panorama. You can imagine this as a long tapestry hanging around the viewer.
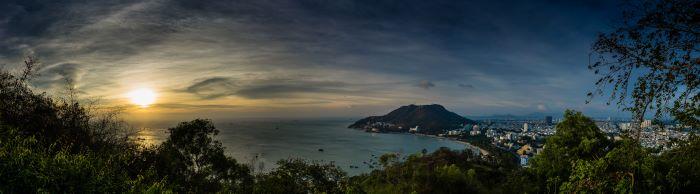
As a simple example, here is a panorama made from 7 individual images, taken in portrait format.


The result is a cylindrical panorama with a viewing angle of 150°

360 Degree Panorama
A 360-degree panorama is a spherical panorama, also called a globe panorama. All viewing angles are reproduced here. The interactive panoramas found on the internet depict a horizontal angle of 360° and a vertical angle of 180°.
Various viewers offer the common controls in all four directions, including a zoom function in the panorama.
How to create 360-degree panoramic photos
For a 360-degree panorama, you need not only an overlap on the sides of the individual image, but also on the top and bottom edges. For the vertical, several rows of individual images are thus stacked on top of each other.
The following 360-degree panorama consists of five rows of 25 individual images each, totaling 125 individual images. The result is a 239-megapixel photo.

The rows were taken with a vertical pan of 15 degrees each.
Stitching Software: Assembling Individual Images
Stitching software combines individual images. Since photos are two-dimensional representations, a coordinate system is placed on each photo. Overlapping points are recognized, and the individual images are then assembled into a panoramic photo. Exposure correction is usually also performed when rendering the panorama.
However, the following applies: If the preparation, i.e., the adjustment of the panoramic head, is very precise, the stitching software has very little to correct, and the best results are achieved.
There are various stitching programs. The best known are:
- Adobe Photoshop
- Autopano Giga
- Hugin (free)
Autopano Giga
Here you see the application example in the stitching software Autopano Giga.

Be creative in the panorama area
Panoramic photography alone offers plenty of room for creative ideas. If you expand the possibilities with ePanos for panoramic and time-lapse shots and the many possible combinations of settings, wonderful things can emerge. Be it in a hobby context, for example, capturing the football match at your son's next home game in a time-lapse – or in a professional context when presenting a shopping center.
The possibilities are endless, be curious and imaginative!
More information about the product used: Rollei Panoramic Head 200
The Rollei Panoramic Head 200 is a professional and cost-effective solution for creating high-quality panoramas.
A panoramic photo is assembled from a multitude of individual images using so-called stitch software (as described above). A basic prerequisite for a successful panoramic photo is therefore precise preliminary work. With a panoramic head, the camera is optimally aligned around the optical axis of rotation. Without a panoramic head, ghosting occurs because the individual images do not fit together optimally.
Once the panoramic head is precisely aligned, a panorama from individual images in several rows is no longer a problem. For a 360° panorama, this is essential. These spherical panoramas usually consist of more than 50 photos, and are known from virtual tours online.
Get started in professional panoramic photography with the Rollei Panoramic Head 200 and be surprised by the results.
Share:
Camera types – What's the right camera for me?